Memories Preserved in Walnut
It's finally warming up out here—the forecast even calls for 60's in the 10-day forecast. Unbelievable that it was less than two weeks ago when we were sitting in the negatives for daytime highs. Spring has sprung—or at least we're hoping it has—and we'll take it!
Phil's out cutting joinery tonight—finishing up a front entry for a couple of new homeowners, and I'm in here, trying to make some improvements to the website. As I'm looking at pictures to add from this past year, I've come across some from this past fall that I really love, and I thought I might share them here, with you.
It is so genuinely satisfying getting to know the people who we build for—we spend so many hours working on each piece of their project, it is nice to have a connection to the people themselves who will be inheriting the timber, so to speak.
A Trailer Full of Walnut Logs…
The family we built this particular frame for happens to live on a picturesque hillside overlooking Iowa timber ground. They had some walnut logs that had been cut from their timber, and asked Phil if he could incorporate some of the walnut into the frame.
A simple enough request, and one we were thrilled to tackle. "How long do you want those pieces?" He asked me over the phone, early last year. "Oh, probably 4' long. Maybe 4 or 5 of them?" We didn't yet know what we would be doing with them but figured 4 feet would give us a bit of wiggle room as far as design goes.
Soon enough, he was driving to the shop, he and his college-football-playing son having loaded a trailer-load worth of walnut logs for the project. When he drove up, I teased him—we weren't planning on making the whole frame out of walnut!
You've got to be careful where you use green wood. Even though it had been cut down the year prior, timber takes so long to dry down—maybe only drying 1" per year. Once you cut into the center of that timber, well, you're going to be hitting some pretty wet wood.
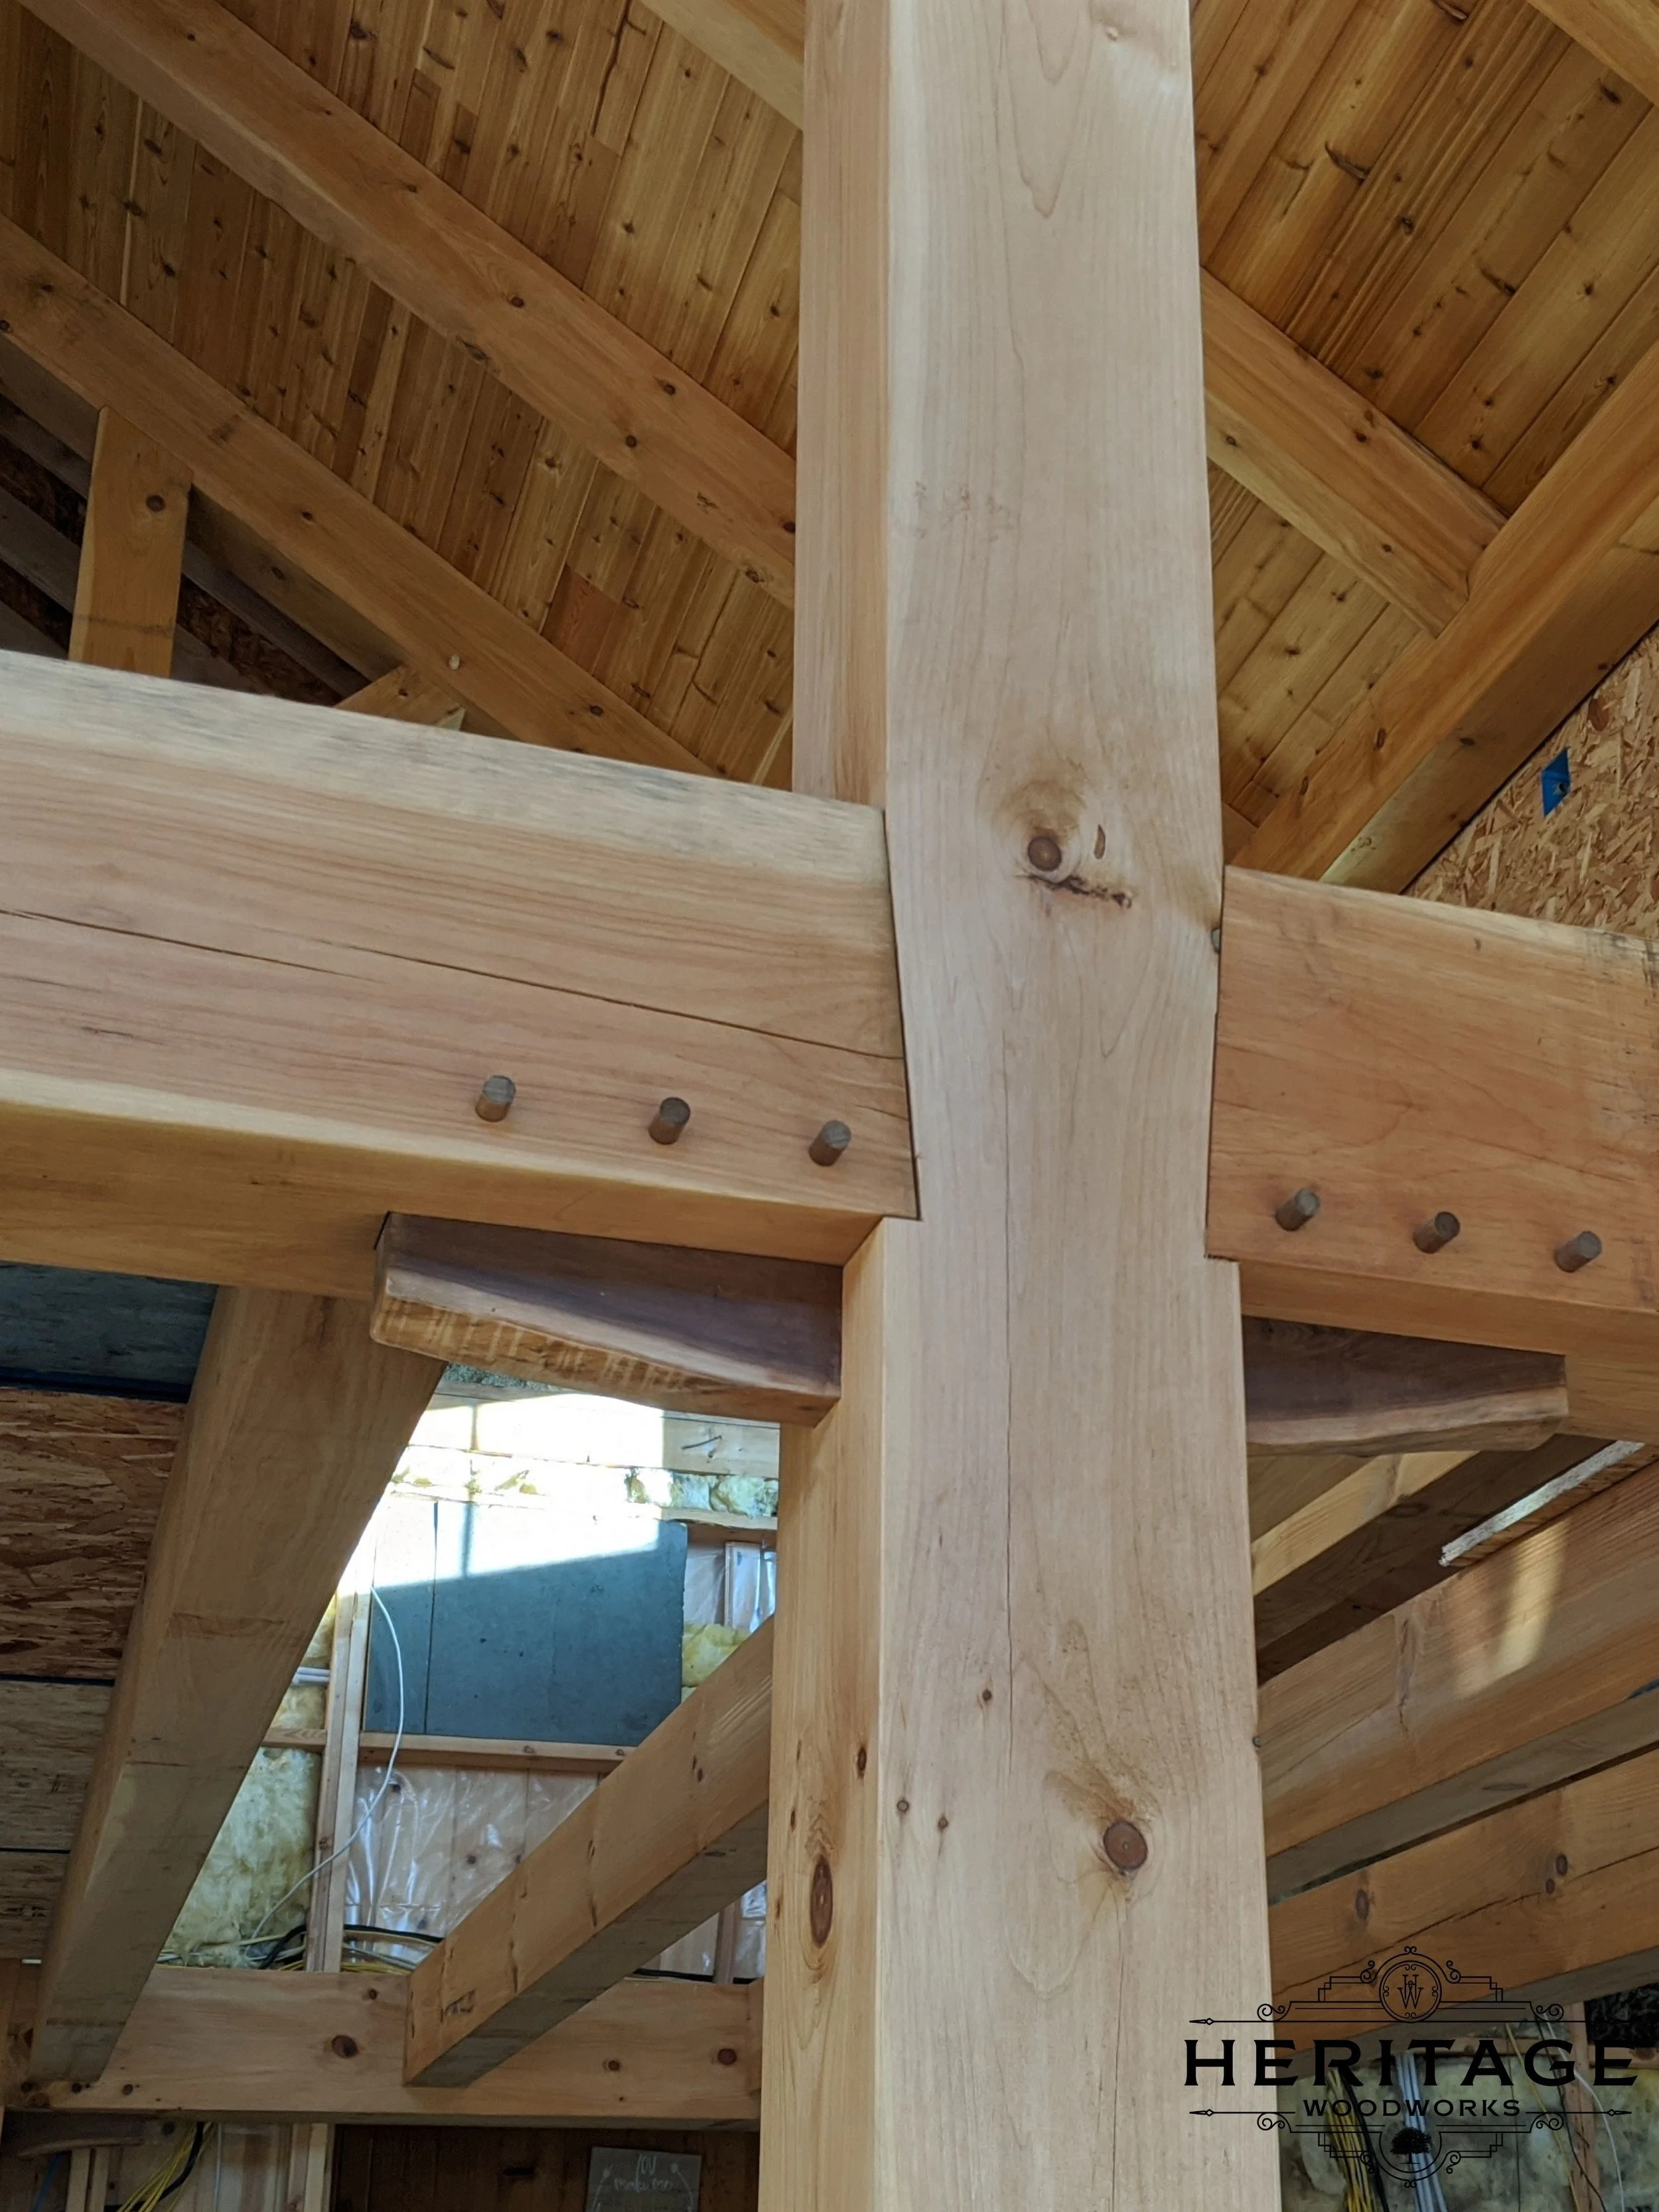
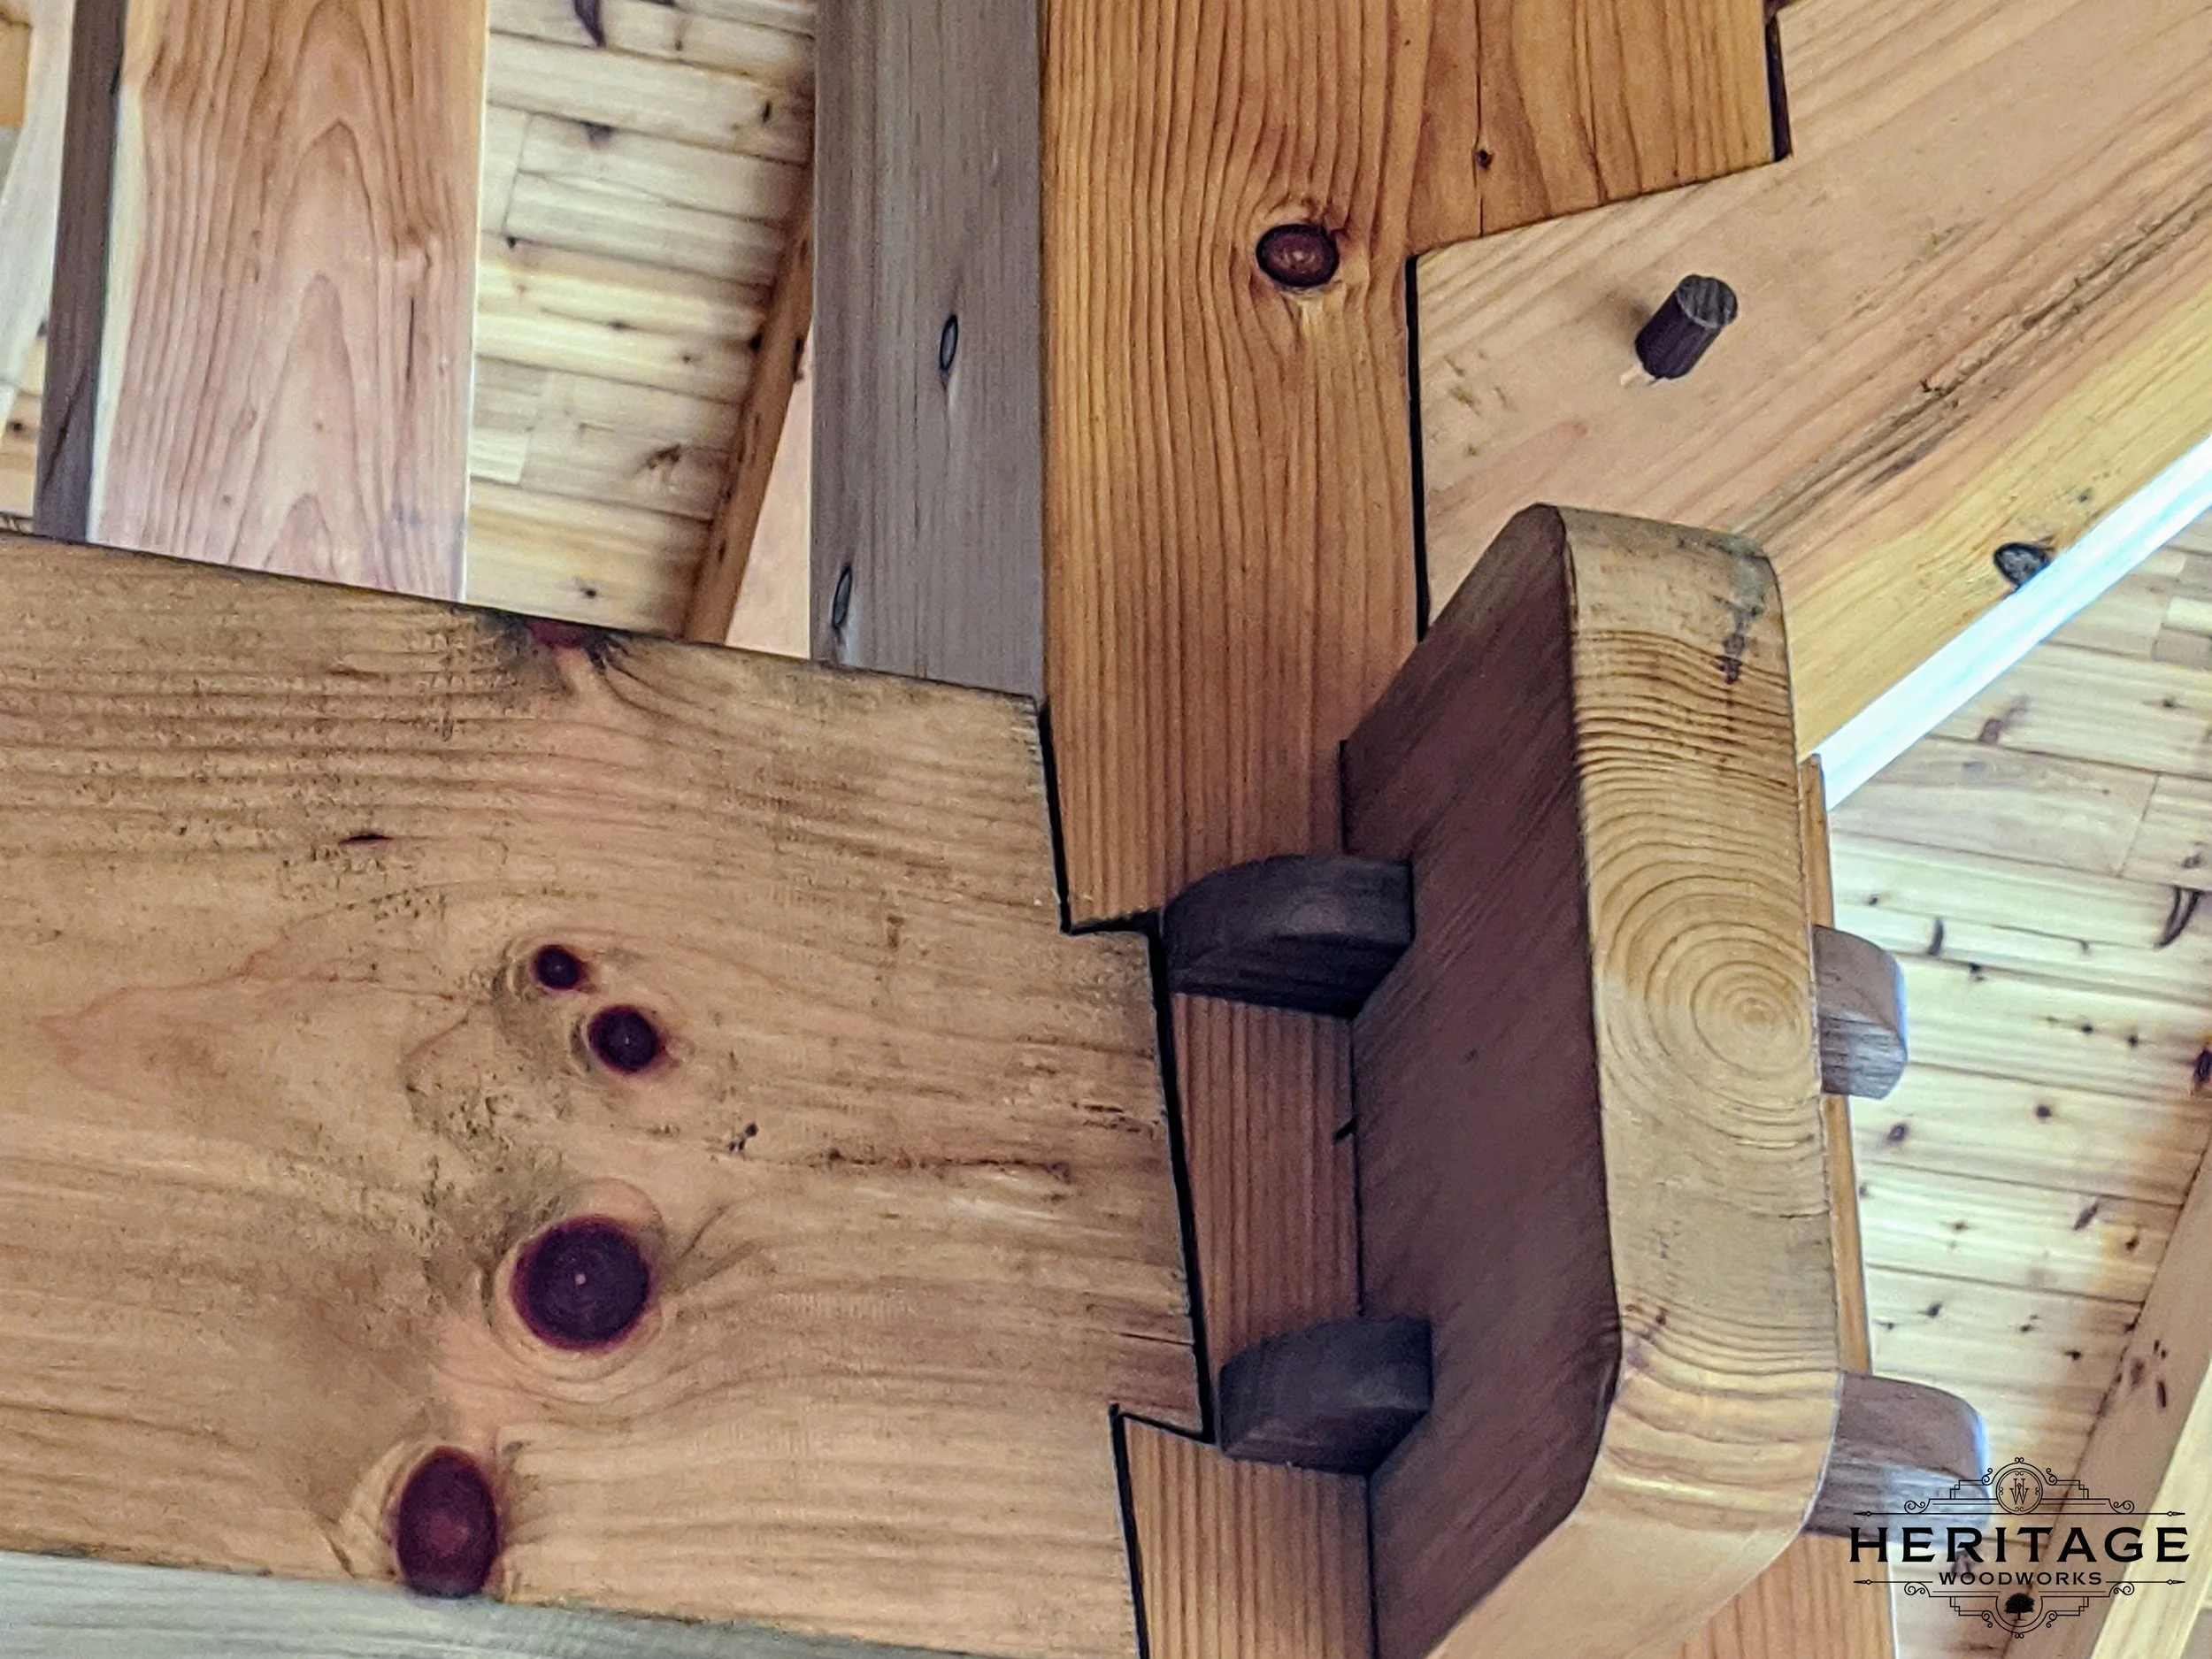
Phil decided to make some splines—which are these here—leaving some of the natural edge, and some wedges. This would give us a few choice elements, while minimizing any complications from the expected dry-down.
We left the natural edge on the splines, taking off the bark and burnishing the edges. It's difficult to tell from the pictures, but burnished, sanded walnut has such a nice, kind feel to it- such a beautiful wood!
…Crafted Into Timber Frame Joinery
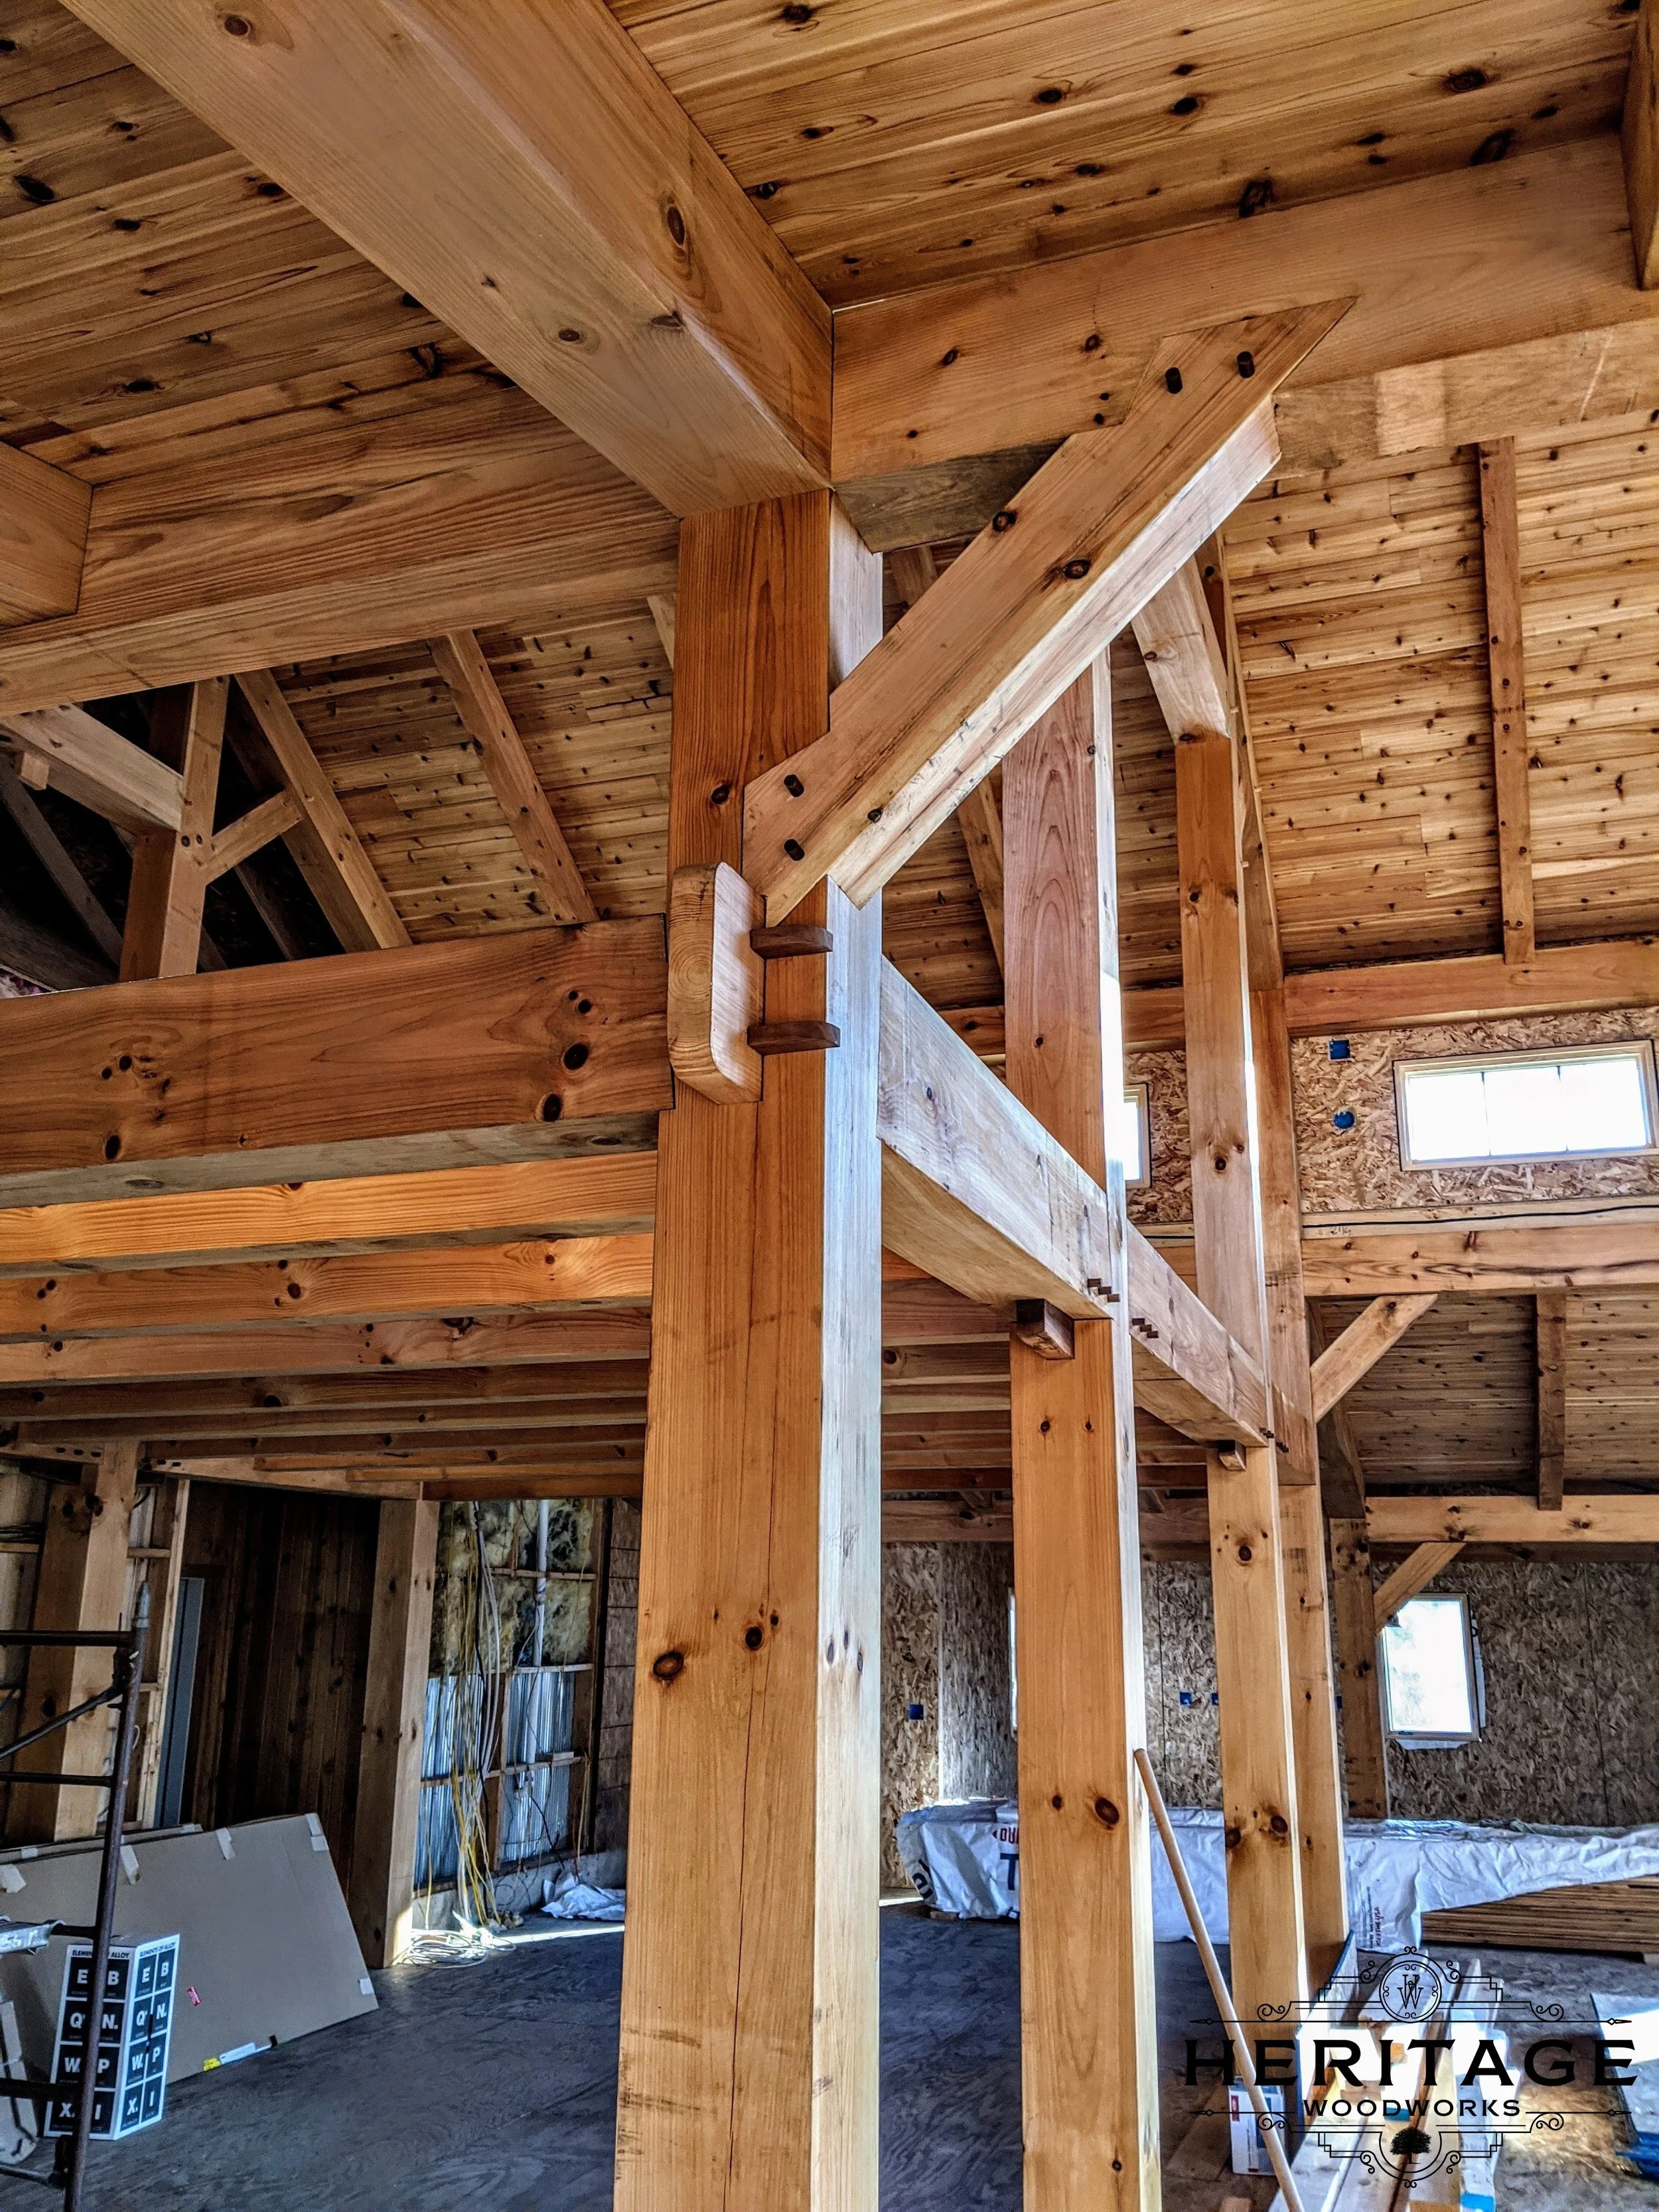
Here to the right is a picture of the installed frame—you can see the splines horizontally supporting those big main beams—-and then the wedges, pulling that joint together. In person, the walnut contrasts beautifully with the pine wood. It turned out so nicely, and what a fun keepsake for the family.
And as a side note- the size of those splines gives you an idea of the size of those timbers!


